NBI Online Appointment & Clearance Renewal Guide 2026
NBI Online Appointment & Clearance Renewal | 2026
Getting an NBI Clearance is an important step when applying for jobs, processing visa applications, or preparing for travel. Before visiting an NBI branch, you must book an online appointment and secure your preferred schedule to ensure a smooth application process.
This guide explains everything you need to know about the NBI Online Appointment system, from booking your first appointment to using the Quick Renewal service without visiting a branch. You’ll also learn which documents to prepare, what to expect if your application receives a HIT or you miss your scheduled appointment, and how to find branch-specific information for Davao, Iloilo, Cebu, Baguio, CDO, Tuguegarao, and other locations across the Philippines. All these services are covered through the same national online portal.
What Is an NBI Appointment and Why Is It Important?
The NBI appointment system is an online scheduling service operated by the National Bureau of Investigation (NBI), an agency under the Philippines Department of Justice (DOJ). Through the online portal at clearance.nbi.gov.ph, applicants can select their preferred appointment date, time, and branch for in-person procedures such as photo capture, fingerprint scanning, and clearance processing.
The system serves first-time applicants, NBI Clearance renewal applicants, and individuals who need clearance for specific purposes, including apostille authentication and overseas use.
Having a confirmed appointment helps ensure that your visit follows the scheduled process. Applicants should book online before going to an NBI branch, whether it is located in a major city or a provincial area. Always check the latest instructions on the official NBI portal to confirm appointment requirements and whether walk-in services are available at your chosen branch.
How to Book an NBI Online Appointment
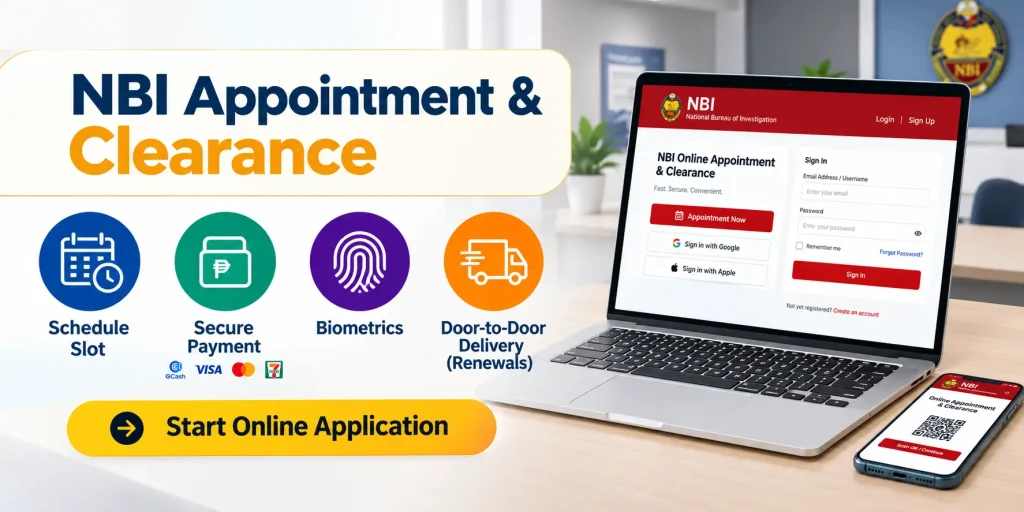
You can access the NBI Clearance appointment system through the main portal at clearance.nbi.gov.ph or by visiting www.nbi.gov.ph. Both provide access to NBI’s online services. First-time job seekers can also check the dedicated portal at firsttimejobseekers.nbi.gov.ph for information about the applicable fee exemption.
Step 1: Visit the Official NBI Portal
Open your preferred web browser and go to the NBI Clearance Online Portal. Before entering any personal information, check the website address carefully and make sure you are using the intended government service. Avoid unfamiliar third-party websites that may imitate the NBI portal, request unnecessary personal details, or add unauthorized fees.
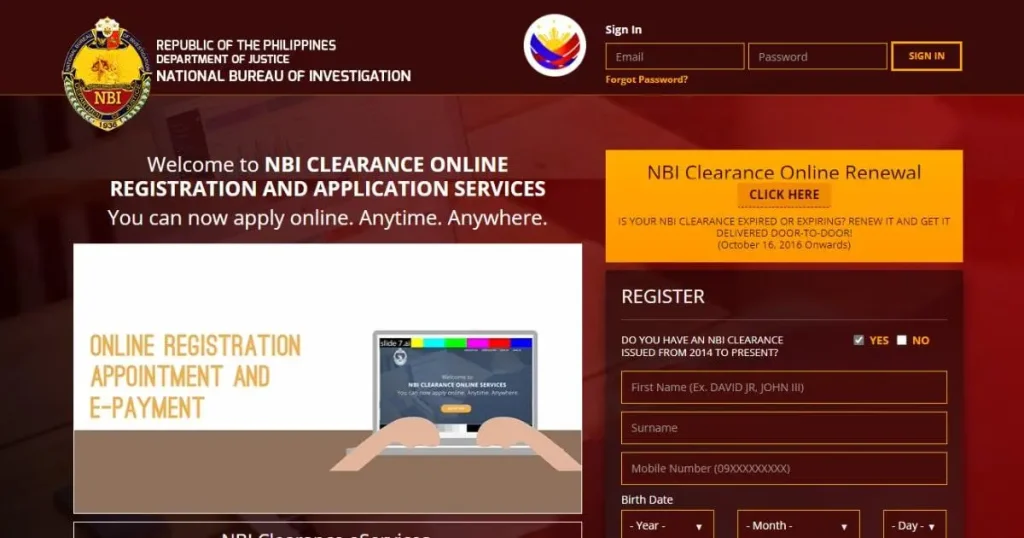
If you are using the system for the first time, select Register to create an account. Applicants who already have an account can choose Log In and enter their existing credentials.
Step 2: Register for an NBI Online Account
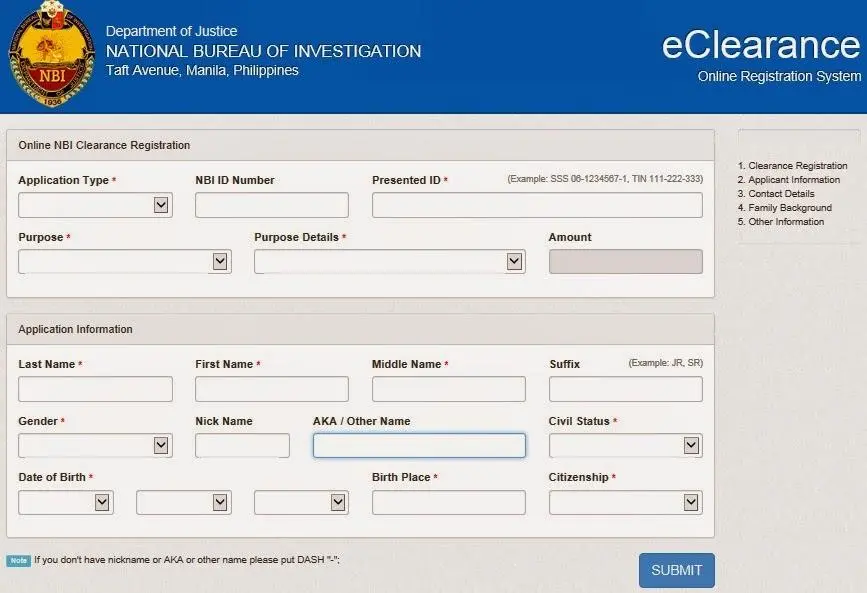
Complete the NBI online registration process by entering your personal information accurately. You may need to provide the following details:
- Full legal name, including your middle name and any applicable suffix, such as Jr., Sr., or III
- Date and place of birth
- Current and permanent residential addresses
- Civil status
- Purpose of your NBI Clearance, such as employment, travel, or a government transaction
- Active email address
- Mobile number capable of receiving a one-time password (OTP)
After submitting the form, follow the portal’s instructions to verify your mobile number using the OTP sent to you. Enter the code before it expires. The supplied instructions indicate a five-minute validity period; if your code expires, request a new one if the system allows it.
Use an email address that you check regularly because appointment confirmations, payment information, and application updates may be sent there.
Common NBI Registration Errors to Avoid
Review your information carefully before submitting the form. Common mistakes include:
- Entering an incorrect email address
- Providing an inactive or incorrect mobile number
- Leaving out your middle name
- Omitting a suffix such as Jr., Sr., or III
- Entering the wrong date or place of birth
- Using a nickname instead of your legal name
- Creating duplicate accounts without a valid reason
Your registration details should match your valid identification documents. Incorrect or inconsistent information can lead to additional verification and delays when you visit the branch.
Step 3: Complete the NBI Clearance Application Form
Once you have logged in, select Apply for Clearance and fill out the application form. Check that your personal details, contact information, and stated purpose of the clearance are correct.
The portal may also ask you to identify the valid IDs you intend to present during your appointment. Follow the instructions displayed on your application and bring the required identification documents on the day of your visit.
Depending on the form, you may also need to enter your spouse’s name, your father’s name, your mother’s maiden name, and identifying marks, where applicable. Review every field before proceeding to avoid discrepancies during verification.
Why this step matters: Accurate information helps NBI personnel verify your identity and process your application. Differences between your submitted details and identification documents may require clarification or additional checks.
Step 4: Select Your NBI Branch, Appointment Date, and Time
After completing the application form, proceed to the appointment scheduling section. Choose a branch and check its available dates and appointment sessions using the calendar provided by the portal.
Your selections generally include:
- NBI branch: You can choose a participating branch nationwide, subject to the available services and appointment rules.
- Appointment date: Select an available date that fits your schedule.
- Time session: Choose the available morning or afternoon session, as displayed.
Appointment availability can change quickly, particularly at busy branches in Metro Manila, Cebu, Davao, and Iloilo. Check the portal regularly if you cannot find a suitable slot.
If your preferred branch has no available appointments, consider checking another nearby branch, including an NBI office in an SM or Robinsons mall. However, confirm the services offered and the available schedule before making your selection, as facilities and procedures may differ.
Step 5: Pay the NBI Clearance Application Fee
After choosing your appointment details, follow the payment instructions shown on the portal. The supplied guide lists the standard NBI Clearance fee for 2026 as ₱155, consisting of a ₱130 clearance fee and a ₱25 e-service charge. The exact amount may vary depending on the payment channel and any applicable convenience fees, so check your transaction page before completing payment.
Commonly listed payment options include:
- GCash — mobile wallet payment
- Maya / PayMaya — digital payment
- Online banking — participating banks such as BPI, BDO, Metrobank, UnionBank, and Land Bank
- 7-Eleven — through supported Cliqq payment facilities
- Bayad Center — through participating over-the-counter or online services
- ECPay and Dragonpay — where available through the payment instructions
Once your payment has been processed, return to your NBI account and check your transaction status. Your appointment details or appointment slip should become available according to the portal’s processing procedure.
NBI Clearance fee exemption for first-time job seekers
Eligible first-time job seekers may qualify for a fee exemption under Republic Act No. 11261, also known as the First Time Jobseekers Assistance Act. Applicants generally need to obtain a barangay certification confirming their eligibility and meet the applicable requirements.
The original guide specifies that the barangay certificate should include an oath of undertaking and that the benefit is available only once, subject to the law’s conditions. Check the latest NBI instructions and the validity requirements for your certificate before your appointment. Do not assume that a standard paid transaction will automatically qualify for a refund or exemption.
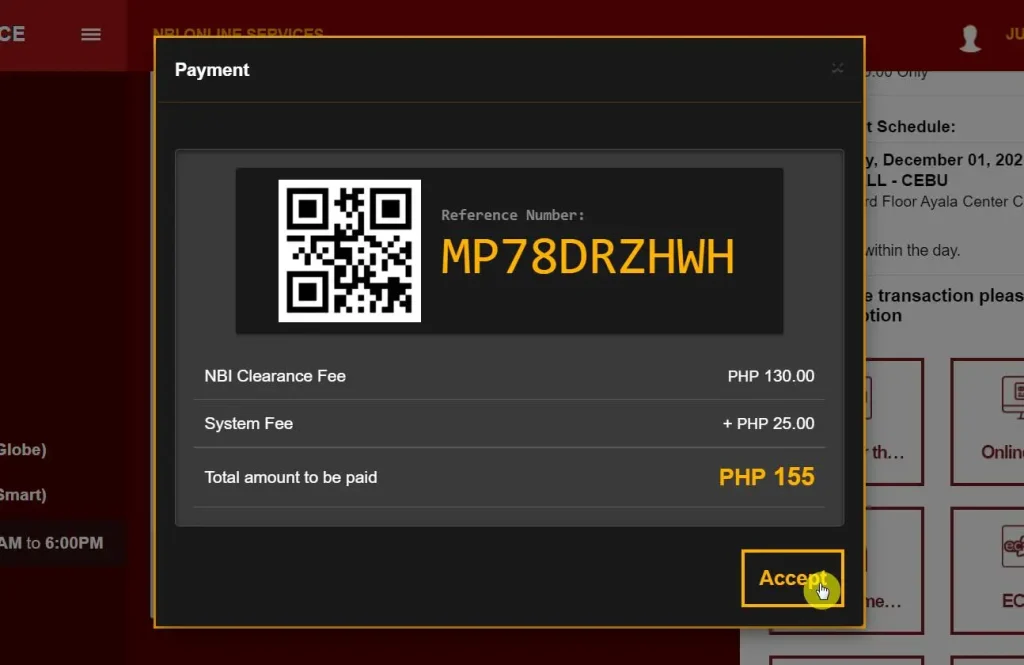
Important: The ₱155 total and listed payment channels should be verified against the amount and options displayed in your active transaction. Payment providers may charge additional convenience fees, and available methods can change.
Step 6: Download and Keep Your NBI Appointment Slip
After completing the required booking and payment steps, save your NBI appointment slip as soon as it becomes available. Take a screenshot or download the document to your phone or computer. You can also sign back in to your account and check your application or transaction history if you need another copy.
Before leaving for your appointment, make sure you have:
- Your NBI appointment slip, either printed or saved on your phone
- The valid identification documents required for your application
- Your payment confirmation or reference details, if applicable
- Any additional documents required for your specific situation
Keep your appointment slip easy to access because branch personnel may ask to see your booking details or scan a QR code, where supported. If you use a digital copy, make sure the text and any QR code are clearly visible on your screen.
Arrive at your selected branch with enough time to complete the required checks. Following these steps and reviewing the latest instructions on the NBI portal can help you prepare for your visit and reduce avoidable delays.
How to Pay for Your NBI Appointment Through GCash
GCash is one of the digital payment options applicants may encounter when paying for an NBI Clearance appointment in the Philippines. If the option is available for your transaction, follow the steps below to complete your payment and keep a record of the transaction.
1. Open the GCash app on your mobile device and sign in to your account.
2. From the home screen, select Pay Bills.
3. Look for NBI in the available billers, if listed.
4. Enter the reference number provided by your NBI application.
5. Enter the payment amount displayed on your active NBI transaction.
6. Review the details and confirm the payment.
7. Save your GCash transaction receipt or take a screenshot for your records.
After paying, return to the NBI portal and check your transaction status. The original guide suggests allowing 5–15 minutes for confirmation, although processing times can vary. If the payment status has not updated after 30 minutes, retain your receipt and contact the appropriate support channel before making another payment.
Payment safety tip: Never send money to personal mobile numbers or unofficial accounts claiming to arrange NBI appointments. Use the payment methods displayed in your NBI transaction or verified payment channels. Avoid paying a second time until you have confirmed the status of your original transaction.
Once issued, an NBI Clearance is commonly treated as valid for one year, although the receiving organization may have its own requirements. Check the printed issuance date and confirm whether you need a new clearance for your intended purpose.
NBI Clearance Renewal: Quick Renewal vs. In-Person Renewal
Many applicants are unsure which NBI Clearance renewal method to choose. There are two options described in this guide: Quick Renewal (Online) and Standard In-Person Renewal. They differ in processing procedures, fees, and eligibility requirements.
| Renewal Method | Branch Visit Required? | Fee |
|---|---|---|
| Quick Renewal (Online) | No, if eligible | ₱155 + delivery fee |
| Standard In-Person Renewal | Yes | ₱355 (₱330 clearance fee + ₱25 service fee) |
Which option should you choose?
Quick Renewal may be convenient if your previous clearance was issued after October 2016, your personal information remains unchanged, and your application meets the current eligibility requirements. It allows eligible applicants to avoid visiting an NBI branch, with the renewed clearance delivered to their address.
Before applying, confirm the latest renewal rules, fees, and eligibility criteria through the NBI portal, as these requirements may change.
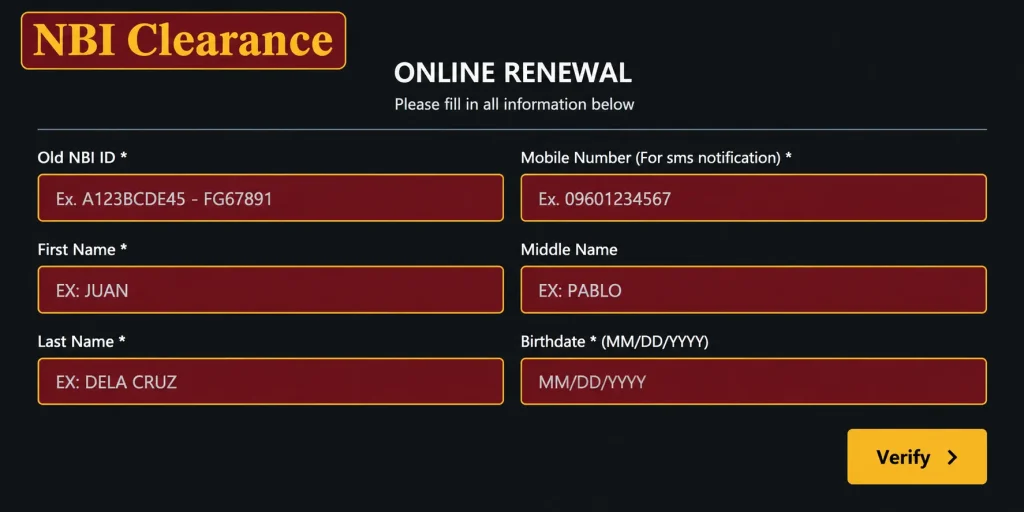
How to Renew Your NBI Clearance Online
The NBI Quick Renewal service allows eligible applicants to renew their clearance online and have the new certificate delivered by courier, without visiting a branch. Follow these steps to complete the process:
1. Visit the NBI Clearance Portal: Open NBI Clearance Online and log in to your account.
2. Select the Renewal Option: Click Apply for Clearance and choose the renewal option available in the system.
3. Confirm Your Previous Clearance: When asked whether you have an existing NBI Clearance, select Yes.
4. Enter Your NBI ID Number: Provide the NBI ID number printed on your previous clearance certificate so the system can identify your existing record.
5. Review Your Personal Information: Check that your name, date of birth, address, and other details are accurate. If any information has changed, follow the portal’s instructions to determine whether you need to visit an NBI branch.
6. Provide Your Delivery Address: Enter your complete and correct mailing address to help ensure that your renewed clearance reaches you successfully.
7. Pay the Required Fee: Complete the online payment using an available payment method. The delivery charge may be approximately ₱200–₱350, depending on your location, in addition to the applicable clearance fee. Confirm the final amount on the portal before paying.
8. Wait for Delivery: After completing the transaction, monitor your application or delivery status. The estimated delivery period is 5–10 business days, although the actual timeframe may vary depending on your location and courier service.
How to Renew Your NBI Clearance In Person
In-person renewal may be suitable if your application requires additional verification, you need to update your personal information, or you prefer to complete the process at an NBI branch. Follow these steps to prepare for your visit:
- Visit the NBI Portal: Go to NBI Clearance Online and sign in to your account.
- Select Renewal: Follow the application instructions and choose the renewal option when prompted.
- Enter Your Previous NBI ID Number: Provide the ID number printed on your existing clearance certificate, if requested.
- Book an Appointment: Select your preferred NBI branch, available date, and appointment time.
- Pay the Required Fee: The original guide lists a total of ₱355, consisting of a ₱330 clearance fee and a ₱25 service fee. Confirm the current amount displayed on the portal before paying.
- Prepare Your Documents: Bring your previous NBI Clearance, your appointment confirmation, and the valid identification documents required by the branch. The original guide recommends bringing two valid government-issued IDs; verify the current ID requirements before your visit.
Important: The original guide states that clearances issued before 2014 cannot be processed as renewals. However, eligibility rules may change, so check with the NBI portal or your chosen branch to determine whether your older clearance can be renewed or whether you need to submit a new application.
What to Bring to Your NBI Appointment
Preparing the required documents before your NBI appointment can help you avoid unnecessary delays or another trip to the branch. Before leaving home, review the NBI Clearance requirements and make sure you have the documents needed for your application.
Documents Required for All Applicants
Applicants should prepare the following items before visiting their selected NBI branch:
- NBI Appointment Slip: Bring a printed copy or a digital version showing your appointment details and reference number or QR code, where applicable.
- Original Valid ID: Carry at least one original, valid government-issued identification document that matches the ID details selected during your online application.
- Photocopy of Your ID: Some branches may request a photocopy in addition to the original, so prepare one beforehand if required.
Accepted Valid IDs for NBI Clearance
The following identification documents are listed as options for NBI Clearance applications, subject to current NBI rules and branch requirements:
- Philippine Passport issued by the Department of Foreign Affairs (DFA)
- Driver’s License issued by the Land Transportation Office (LTO)
- UMID, SSS, or GSIS ID
- PhilHealth ID
- Voter’s ID or Voter’s Certification
- Professional Regulation Commission (PRC) License
- Postal ID in the accepted format
- Philippine Identification System (PhilSys) National ID
- School ID accompanied by a PSA Birth Certificate, where accepted for students
Identification documents that may not be accepted as primary IDs include:
- Private company or employee IDs
- Barangay Clearance or Barangay Certificate
- Expired identification documents
- Photocopies submitted without the original ID
Acceptance can depend on current NBI guidelines. Check the latest official requirements before your appointment to confirm that your chosen ID is acceptable.
Requirements for First-Time Job Seekers
Eligible first-time job seekers may qualify for a free NBI Clearance under Republic Act No. 11261, also known as the First Time Jobseekers Assistance Act.
If you intend to claim this benefit, bring the required Barangay Certification confirming your first-time job seeker status. Make sure the certificate meets the applicable requirements and remains valid when you submit your application.
Requirements for OFWs and Applicants Applying from Abroad
Overseas Filipino Workers (OFWs) and other Filipinos applying for NBI Clearance from abroad should contact the nearest Philippine Embassy or Consulate for instructions.
The relevant office can explain the application procedure and provide guidance on fingerprint cards and other required documents. The original guide lists a fee of approximately US$25, but the actual charges and payment procedures may vary depending on the location and service involved. Confirm the current requirements with the embassy or consulate before applying.
Requirements for Foreigners Living in the Philippines
Foreign nationals who legally reside or work in the Philippines may also apply for NBI Clearance, subject to the applicable eligibility rules.
The original guide lists these documents for identification:
- Valid Passport: To establish the applicant’s identity and nationality.
- Alien Certificate of Registration (ACR I-Card): Where applicable, issued through the Philippine Bureau of Immigration.
Check with the NBI or Bureau of Immigration to confirm which documents are required for your particular immigration status.
Additional Requirements for Apostille Processing
If you need an NBI Clearance for use abroad, first determine whether the receiving authority requires an apostille or another form of authentication.
The clearance application and apostille process are separate procedures. You should follow the NBI’s instructions to obtain your clearance and then consult the Department of Foreign Affairs (DFA) for the applicable authentication requirements. Additional documents or steps may be necessary depending on the purpose and destination country.
Final reminder: Before attending your appointment, double-check your appointment slip, identification documents, and any additional requirements specific to your situation. Preparing everything in advance can make the application process more straightforward.
What to Wear to Your NBI Clearance Appointment
Although the NBI may not enforce a specific dress code for every branch, wearing appropriate and comfortable clothing can help make your appointment easier. You may need to wait for your turn, and processing times can vary depending on the branch and the number of applicants.
Recommended Clothing for Your Appointment
Choose neat, comfortable clothing that is suitable for an official government office. If you wear a hijab for religious reasons, you can generally wear it during your appointment, provided your face remains visible when required for identification and biometric photography.
Clothing and Accessories to Avoid
To help prevent delays during photo capture and identity verification, consider avoiding the following:
- Sleeveless tops, if restricted by your chosen branch
- Slippers or other footwear that may not meet local branch guidelines
- Caps or hats that obscure your face during photography
- Large accessories around your face or neck that interfere with the biometric photo
Branch rules may differ, so check any specific instructions before your scheduled visit.
Helpful tip: Bring a bottle of drinking water, particularly if you expect a long wait. January, June, and November may be busy periods for some applicants, so allowing extra time for your appointment can be useful.
How to Reschedule Your NBI Appointment
If you cannot attend your scheduled NBI Clearance appointment, you may be able to select a different date before your original appointment expires. Follow these steps to check whether rescheduling is available for your booking:
- Visit the NBI Clearance Online Portal and sign in to your account.
- Open the My Appointments or Application History section, depending on the options displayed.
- Find your active appointment and look for the Reschedule Appointment option.
- Choose a new appointment date, time, and branch from the available selections.
- Review your updated appointment details and save the confirmation for your records.
Can I Change My NBI Appointment Branch?
You may be able to select another branch when rescheduling, depending on the options available in your account. Check the portal to confirm whether your booking allows a branch change before finalizing your new schedule.
Is There a Fee for Rescheduling?
The original guide states that rescheduling before the original appointment date does not require an additional payment. However, payment rules may depend on your transaction status and the current NBI system, so review any instructions displayed before confirming your changes.
What Happens If I Miss My Appointment?
If your scheduled date has already passed, sign in to your account and check whether the existing application can still be used. You may need to book another appointment and pay the applicable fee if the original booking is no longer valid.
Can Someone Else Use My Appointment?
NBI appointments are intended for the registered applicant and are not transferable to another person. You should attend using your own application details and identification documents so that NBI personnel can verify your identity and complete the required biometric procedures.
How to Cancel an NBI Appointment
If you no longer need your scheduled NBI Clearance appointment, sign in to the NBI Clearance Online Portal and check whether the cancellation option is available for your application.
Follow these steps:
- Open the NBI Clearance portal and log in to your account.
- Navigate to your active application or appointment history.
- Look for the Cancel Appointment option, if available.
- Follow the instructions displayed by the system to complete the cancellation.
NBI Appointment Cancellation and Refund Policy
Before cancelling your appointment, review the payment terms associated with your transaction. The original guide states that the ₱155 clearance fee is non-refundable after payment confirmation, except in certain situations involving technical errors, such as duplicate charges.
If you believe a system error caused an incorrect or duplicate payment, contact the appropriate NBI support channel and retain your payment receipt, transaction reference number, and any relevant screenshots as supporting evidence. Refund eligibility depends on the applicable rules and the outcome of the review.
Can You Visit an NBI Branch Without an Appointment?
Applicants should check the current appointment requirements before visiting an NBI branch. The original guide states that online appointments are required nationwide and that applicants without confirmed bookings may be turned away.
This guidance applies to the types of offices mentioned in the guide, including main offices, provincial branches, and mall-based satellite locations. However, walk-in arrangements and exceptions may vary depending on current NBI instructions and the services offered at a particular branch.
To avoid an unnecessary trip, book through the NBI Clearance Online Portal and make sure your appointment is confirmed before travelling.
Can You Arrive Earlier or Later Than Your NBI Appointment?
Arriving at the right time can help you avoid unnecessary waiting or the risk of missing your scheduled slot. The following guidance reflects the original article’s recommendations; actual admission and processing depend on the branch’s rules and workload.
Arriving Earlier on the Same Day
- Recommended: Aim to reach your selected branch around 10–15 minutes before your appointment. This gives you time to locate the office, organize your documents, and follow any entrance procedures.
- Some branches may accommodate applicants earlier if capacity permits, but arriving several hours before your assigned time does not guarantee early processing.
Arriving on a Different Day
- Generally not permitted without an approved change: Your appointment is associated with a particular date and time. Arriving a day early does not automatically make your booking valid for that day.
- If you need to visit on another date, check whether rescheduling is available through your account before going to the branch.
Arriving After Your Scheduled Time
- Depends on branch policy: Arriving late may affect whether you can still be accommodated. A short delay does not guarantee acceptance, and arriving an hour or two late may create problems if your appointment window has closed.
- If you expect to be late, contact the branch or check the portal for instructions instead of assuming that your booking will remain valid.
Safest approach: Arrive 10–15 minutes early, bring all required documents, and follow the instructions provided by the branch staff.
What Happens If You Miss Your NBI Appointment?
Missing your scheduled appointment can affect your application and may require you to arrange another booking. According to the original guide, the possible consequences include:
- Loss of your reserved slot: The branch may no longer accommodate you under the missed appointment.
- No automatic refund: Your payment may not be refundable simply because you did not attend.
- A new appointment may be necessary: You may need to sign in again, check your application status, and book another available schedule.
- Whether you must pay again depends on the status of your original transaction and the current NBI rules. Before submitting another payment, check your account and contact NBI support if you are unsure whether your existing application can still be used.
- If you miss your appointment because of an emergency or an unexpected delay, ask the relevant branch or support channel whether any alternative arrangement is available. Do not assume that an exception or automatic rebooking will be granted.
- Helpful tip: Set two reminders on your phone: one two days before your appointment and another the evening before. Keep your appointment slip and required IDs together so you are ready when the day arrives.
NBI Clearance vs. Police Clearance: What Is the Difference?
NBI Clearance and Police Clearance are both used to verify a person’s records, but they differ in their issuing authorities, coverage, and intended purposes. Understanding these differences can help you determine which document you need for your application or official transaction.
| Feature | Police Clearance | NBI Clearance |
|---|---|---|
| Coverage | Generally focuses on local police records and verification | Uses the National Bureau of Investigation’s records and verification process |
| Issuing Authority | Philippine National Police (PNP), through the appropriate police office | National Bureau of Investigation (NBI) |
| Common Uses | Employment and other transactions requiring police clearance | Employment, travel, visa applications, business, and legal transactions |
| Recognition | Acceptance depends on the organization requesting it | Commonly requested for national-level transactions and certain international applications |
Which Clearance Should You Get?
The correct document depends on the requirements of the employer, government agency, embassy, or other organization handling your application.
For employment, visa processing, or transactions involving a foreign embassy, an NBI Clearance may be specifically required. However, it is not accurate to assume that a Police Clearance is never accepted for these purposes. Some organizations accept either document, while others require one particular certificate.
Before applying, check the document requirements provided by the requesting organization to avoid paying for the wrong clearance or repeating the application process.
What Is an NBI HIT and What Should You Do About It?
Receiving a HIT during your NBI Clearance application can be worrying, especially if you need the certificate for employment, travel, or another important transaction. However, a HIT does not automatically mean that you have a criminal record or that your application has been rejected.
A HIT generally indicates that your name matches an existing record in the NBI database and requires further verification. This can happen when several people have similar or identical names.
What Happens When Your NBI Clearance Gets a HIT?
If your application receives a HIT, the NBI may need additional time to verify your identity and review the matching records. Depending on the circumstances, you may be asked to return on a specified date to complete the process.
Here are some important points to remember:
- Additional verification may be required: Your application could undergo a manual review before the clearance is released.
- Processing may take longer: The original guide estimates approximately 5–10 working days, but the actual waiting period depends on the case and the instructions provided by NBI personnel.
- Follow your assigned release date: Check the information given by the branch to determine when you should return.
- Confirm whether another payment is necessary: A HIT does not automatically mean that you must pay again. Check your application status and follow the instructions from the NBI.
- Quick Renewal may not be suitable: If your application requires in-person identity verification, you may need to visit an NBI branch rather than complete the process through Quick Renewal.
Remember: A HIT is a request for further verification, not proof of wrongdoing. Follow the instructions provided by the NBI and allow the agency to complete its review.
NBI Apostille Appointment: How Does the Process Work?
If you plan to use your NBI Clearance abroad for immigration, overseas employment, education, or another official purpose, you may need an apostille. The NBI issues the clearance, while the Department of Foreign Affairs (DFA) handles apostille services for eligible Philippine documents.
The exact requirements depend on the receiving country and the organization requesting your documents. Before making an appointment, confirm whether an apostille is required and whether any additional authentication steps apply.
Step 1: Apply for Your NBI Clearance
Start by visiting the NBI Clearance Online Portal. Complete your application, select an available appointment, and choose the appropriate purpose for your clearance, such as use abroad, if that option is provided.
Follow the portal’s instructions and attend your appointment with the required identification documents.
Step 2: Schedule a DFA Apostille Appointment
Once you have obtained your NBI Clearance, check the DFA’s current apostille requirements and appointment procedures.
You can visit the DFA Apostille Appointment Portal to check the available services and booking instructions.
Step 3: Submit Your Documents to the DFA
Attend your scheduled appointment and bring the documents specified by the DFA. These may include your original NBI Clearance and any additional supporting documents required for authentication.
The original guide lists an estimated apostille fee of approximately ₱200. However, fees and service requirements may change, so confirm the current charges before attending your appointment.
Check the Clearance Date Before Applying
Some foreign embassies, employers, and immigration authorities require an NBI Clearance issued within a particular period, often three to six months. This is not a universal rule, so check the requirements of the organization receiving your documents before starting the apostille process.
NBI Appointment by City: Regional Booking Guide
Applicants across the Philippines can use the NBI Clearance Online Portal to check appointment availability and select their preferred branch. You generally do not need a separate appointment website for each city.
The branches listed below serve different regions of the country. Availability, operating hours, and appointment capacity can vary, so check the current options in the portal before planning your visit.
NBI Davao
NBI offices in Davao serve applicants across the Davao area and surrounding communities. If your preferred schedule is unavailable, check the portal again or look for another accessible branch. Book ahead if you have a fixed deadline for employment or travel.
NBI Iloilo
Applicants in Iloilo and other parts of Western Visayas can use the national booking system to find an available appointment. Check the branch options and dates displayed in your account rather than relying on assumed weekly release schedules.
NBI Cebu
Cebu serves a large number of applicants, so it is worth checking appointment availability early when you have a deadline. If your preferred office has no open slots, look for other participating branches in the area, including mall-based offices where available.
NBI Baguio
Applicants in Baguio and nearby parts of the Cordillera Administrative Region (CAR) can select an available branch through the national portal. Consider booking in advance during busy periods and confirm the office’s location before travelling.
NBI Cagayan de Oro (CDO)
Applicants in Cagayan de Oro and nearby parts of Northern Mindanao can check the portal for available appointment dates. Availability may vary according to local demand, so plan ahead if you need your clearance for a job application or other time-sensitive purpose.
NBI Tuguegarao
Residents of Tuguegarao and other parts of Cagayan Valley can use the same national booking process. Review the available dates and choose a branch and schedule that fit your travel plans.
Other NBI Branches Across the Philippines
The original guide also lists the following cities and locations for applicants looking for a convenient branch:
- NBI Tacloban — Eastern Visayas
- NBI Naga — Bicol Region
- NBI Legazpi — Albay
- NBI Laoag — Ilocos Norte
- NBI Lipa — Batangas
- NBI Bacolod — Negros Occidental
- NBI Santa Rosa — Laguna
- NBI Cabanatuan — Nueva Ecija
- NBI Koronadal — South Cotabato
- NBI Cotabato City — Bangsamoro Autonomous Region in Muslim Mindanao (BARMM)
- NBI General Santos (GenSan) — South Cotabato area
- NBI Zamboanga — Western Mindanao
- NBI Butuan — Caraga Region
- NBI Dagupan — Pangasinan
- NBI Iligan — Lanao del Norte
- NBI Dumaguete — Negros Oriental
- NBI Olongapo — Zambales
- NBI Malolos — Bulacan
- NBI Lucena — Quezon
- NBI Cavite-area offices — including the Imus or Bacoor locations mentioned in the original guide
You can begin by checking the NBI Clearance Centers directory and then confirming the available branch options through the national appointment portal.
Before visiting: Verify the exact branch address, operating schedule, services offered, and appointment availability. Not every listed city necessarily has the same facilities or service arrangements, and local appointment conditions can change.
NBI Clearance Renewal vs. New Application
The right NBI Clearance option depends on whether you are renewing an existing clearance, applying for the first time, or qualifying for a fee exemption. Use the comparison below to understand the differences in eligibility and fees.
| Method | Who It Is For | Fee |
|---|---|---|
| Quick Renewal (Online) | Holders of clearances issued after October 2016 with no personal information changes or HIT concerns | ₱155 + delivery fee |
| Standard Renewal | Applicants with a HIT, changes to personal information, or older clearances that require further processing | ₱355 |
| New Application | First-time applicants or applicants with clearances issued before 2014 who need to apply again | ₱155 |
| First-Time Job Seeker | Eligible applicants with a Barangay Certificate who qualify for the first-time job seeker exemption | Free (₱0) |
Quick Renewal may allow eligible returning applicants to renew online without visiting an NBI branch. Check the current requirements, applicable fees, and eligibility rules through the official NBI Clearance portal before proceeding.
NBI Appointment Tips for 2026
Check for Available Slots During Off-Peak Hours
Appointment slots at busy locations, including Cebu and Davao, can fill up quickly. Try checking the NBI portal late at night or early in the morning, such as around 11 PM or between 5 AM and 6 AM. Cancellations or newly released slots may become available, although availability is not guaranteed.
Consider Mall-Based NBI Branches
Some NBI service counters are located inside SM and Robinsons malls. These branches may be convenient for applicants who prefer an accessible location. Before booking, confirm that your chosen branch offers the services you need, including photo capture and biometric processing.
Pay Through GCash
If GCash is available as a payment option, it can be a convenient way to settle your NBI appointment fee. Keep your payment confirmation or reference number, and check the portal to ensure your payment has been recorded before expecting your appointment confirmation or reference documents to become available.
Bring the Same IDs You Selected Online
Review your appointment details and prepare the identification documents you selected during registration. Make sure the IDs meet the current NBI requirements and that your personal information matches your application. Bringing the correct documents can help prevent unnecessary delays during processing.
Frequently Asked Questions About NBI Appointments
Conclusion
Getting your NBI Clearance in 2026 can be a much smoother experience when you understand the appointment process and prepare everything before your scheduled visit. From creating an online account and selecting a branch to paying the required fee and keeping your appointment slip, each step helps you avoid common mistakes and unnecessary delays.
Whether you are applying for the first time, renewing an existing clearance, or arranging documents for employment, travel, or use abroad, make sure your personal information matches your valid ID and that you bring all the required documents. If you receive an NBI HIT, miss your appointment, or need to reschedule, check your application status and follow the instructions provided by the NBI.
For eligible applicants, Quick Renewal may offer a convenient way to renew without visiting a branch. Before making any payment or travelling to an NBI office, verify the latest fees, renewal eligibility, appointment availability, and document requirements through the official NBI Clearance portal. A little preparation can help you complete your application with greater confidence and fewer complications.